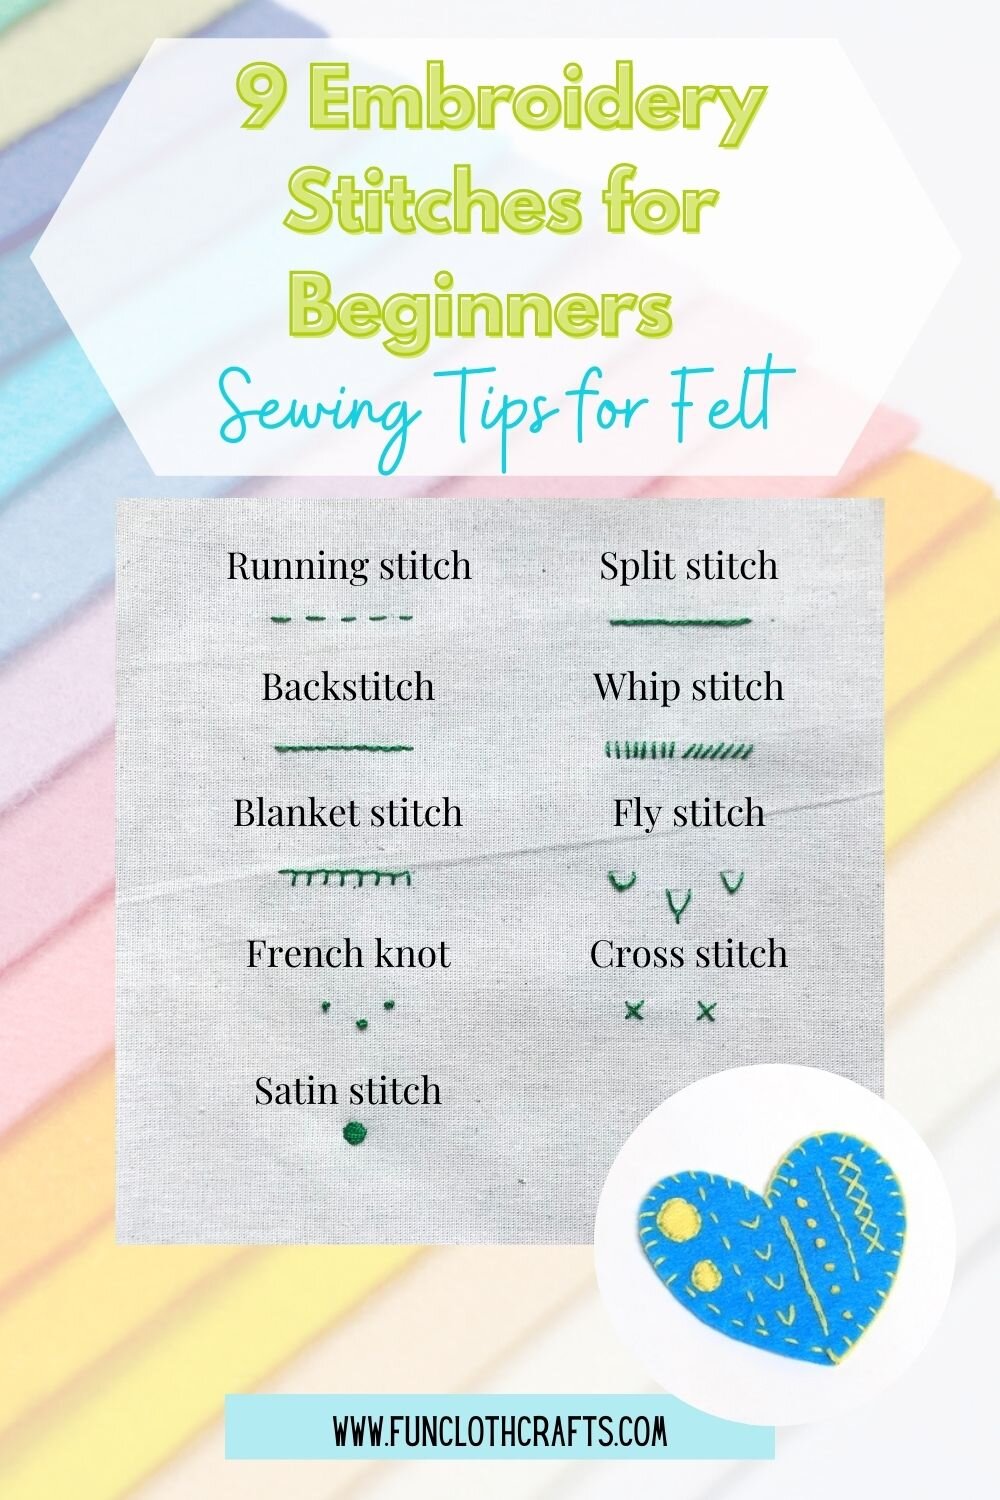
9 Basic Hand Embroidery Stitches For Felt
This post contains affiliate links, which means I may earn a small commission at no additional cost to you if you click through the link and make a purchase. For more information, click here.
Felt embroidery is a popular way to add texture and personality to any craft project. Whether you're creating a cozy felt pillow or a cute stuffed animal, hand embroidery can elevate your work to the next level. However, if you're new to the craft, the number of hand embroidery stitches to choose from can be overwhelming. Don't worry! This article will break down nine basic hand embroidery stitches that are perfect for working with felt. From the classic backstitch to the whimsical French knot, these types of stitches are perfect for adding intricate details and decorative touches to your felt creations. So, grab your needle and thread, and let's get stitching!
How many basic hand embroidery stitches are you familiar with?
Learning different types of embroidery stitches is not as difficult as you might think. With practice, you will soon nail them! I checked and discovered I use 9 different embroidery stitches in all my felt designs. These 9 stitch types are an excellent foundation for your felt craft projects. The majority of these stitches are basic stitches, such as the running stitch, the backstitch, or the blanket stitch. The one that may take some practice to master is the French knot.
What are Embroidery Stitches?
Embroidery stitches are fundamental elements in the art of embroidery. A stitch for embroidery is made with thread and a sewing needle going through the fabric from the backside to the front side and back, resulting in a visible loop or line. The thread element on the front side is called stitch— embroidery stitches form embroidery. Embroidery, on the other hand, refers to the craft of decorating felt, fabric, or other materials using various decorative stitches, patterns, and designs. An embroidery pattern is made by one stitch type or various embroidery stitches following a design or freehand. An embroidery pattern guides the placement and arrangement of stitches, helping the embroiderer create a cohesive and aesthetically pleasing design. Patterns can be purchased or created from scratch, and they provide a framework for the design, ensuring that the stitches are executed correctly. In addition to patterns, embroiderers can experiment with embroidery stitches to create unique designs and motifs.
Have you wondered how many embroidery stitches there are? Pumora embroidery shares the lexicon of embroidery stitches with 206 types of stitches. I definitely recommend her website if you want to dive deep into various embroidery stitches.
Types of Embroidery Stitches and Their Purpose
The hand embroidery stitches can be grouped into four categories, each providing different effects and uses for embroidery designs:
1) Embroidery stitches for outlines
These stitches create outlines of the elements of your design. Running stitch, backstitch, and split stitch are perfect examples of outline embroidery stitches.
Embroidery stitches for outlines are essential techniques utilized to create defined and neat lines in embroidery projects. These stitches not only enhance the outline but also serve to emphasize and frame the various elements of the design. One commonly used outline stitch is the running stitch. It is a basic and simple stitch that involves making straight stitches of equal length along the outline. Another popular outline stitch is the backstitch. It is commonly used when precise and solid lines are required. The backstitch involves stitching backward, with the needle re-entering the fabric at the end of the previous stitch. This ensures a smooth and continuous line throughout the embroidery. Additionally, the split stitch is a decorative outline stitch that adds texture to the design. In this stitch, the needle is brought up through the fabric and then split the previous stitch in half by passing the needle through the center. The result is a line with a braided appearance that provides a unique dimension to the embroidery. Overall, these outline stitches are versatile and can be adapted to various embroidery projects, contributing to the overall beauty and impact of the design.
2) Embroidery stitches for edges and attaching applique
Embroidery stitches are essential for creating beautiful and secure edges and attaching applique. In felt crafts, they are common to sew two felt pieces together. Blanket stitch, whip stitch, and for felt also running stitch are examples of stitches used to finish a seam.
The whip stitch is a simple and versatile stitch that is perfect for edging fabric and attaching applique. It involves passing the needle through both layers of fabric and pulling it through, creating a series of diagonal stitches that secure the edges together. The running stitch is another quick and easy stitch that can be used for edging and attaching applique. It is created by passing the needle in and out of the fabric, creating a series of straight stitches that can be as close or far apart as desired. Finally, the blanket stitch is a decorative stitch that secures edges and adds an attractive finish. It is created by making a loop with the thread, passing the needle through both layers of fabric, and then pulling it through the loop. This creates a series of loops along the edge of the fabric, giving it a neat and decorative look. These stitches provide a range of options for achieving beautifully edged fabric and securely attaching applique.
3) Decorative embroidery stitches
These types of embroidery stitches are used to create decorative details, give texture, and fill space in a design. French knot, chain stitch and fly stitch belong to the category of decorative stitches.
Decorative embroidery stitches add intricate details and a touch of elegance to any piece of felt crafts. One such stitch is the French knot, which creates a small, raised knot on the surface of the fabric. This stitch can be used to create textured details, such as the centers of flowers or the eyes of a design. Another commonly used stitch is the chain stitch, which creates a linked chain-like pattern. It is achieved by pulling the thread through the fabric, leaving a loop on the surface, and then inserting the needle back into the fabric at the same point where the thread emerged. The chain stitch is versatile and can be used to outline shapes or fill in larger areas. Lastly, the fly stitch is a decorative stitch that resembles a small, slanted “U” or “V” shape. It is created by making a small stitch on the surface of the fabric and then looping the thread under the needle before pulling it through. This stitch can be used to create leaves or feathers. Overall, decorative embroidery stitches such as the French knot, chain stitch, and fly stitch are great techniques to add texture, depth, and visual interest to any embroidery project.
4) Embroidery stitches for filling
Filling stitches are used to fill in a specific part of the embroidery design or create shading. Satin stitch is a classic embroidery stitch type for filling an area. Cross stitch is another example of these types of stitches.
Embroidery stitches for filling are essential for creating intricate and detailed designs. Two popular stitches used for filling are the cross stitch and the satin stitch. A cross stitch is a versatile stitch that can be used to fill large areas or create delicate patterns. It consists of two diagonal stitches that cross over each other to form an "X" shape. This stitch creates a textured and even finish, making it perfect for creating solid areas of color or texture. The satin stitch, on the other hand, is perfect for creating smooth and seamless fillings. It is a long straight stitch that closely follows the shape of the design. This stitch creates a dense and polished effect, making it ideal for filling small areas or adding fine details. Both stitches require patience and practice to master, as they require precision and attention to detail. Whether you are creating a floral pattern or a portrait, using these filling stitches can add depth and dimension to your work. So, explore the world of embroidery stitches for filling and let your creativity flourish!
In felt craft projects, I use hand embroidery stitches for the following purposes:
Sewing two pieces of felt together
Attaching applique to felt
Creating outlines and filling, for example, to sew eyes, mouth on finger puppets
Decorating
As with all sewing techniques, practice makes it better. Be careful about your stitch size, length, and consistency. If I’m not happy with the final look of my stitching, I remove it and start over.
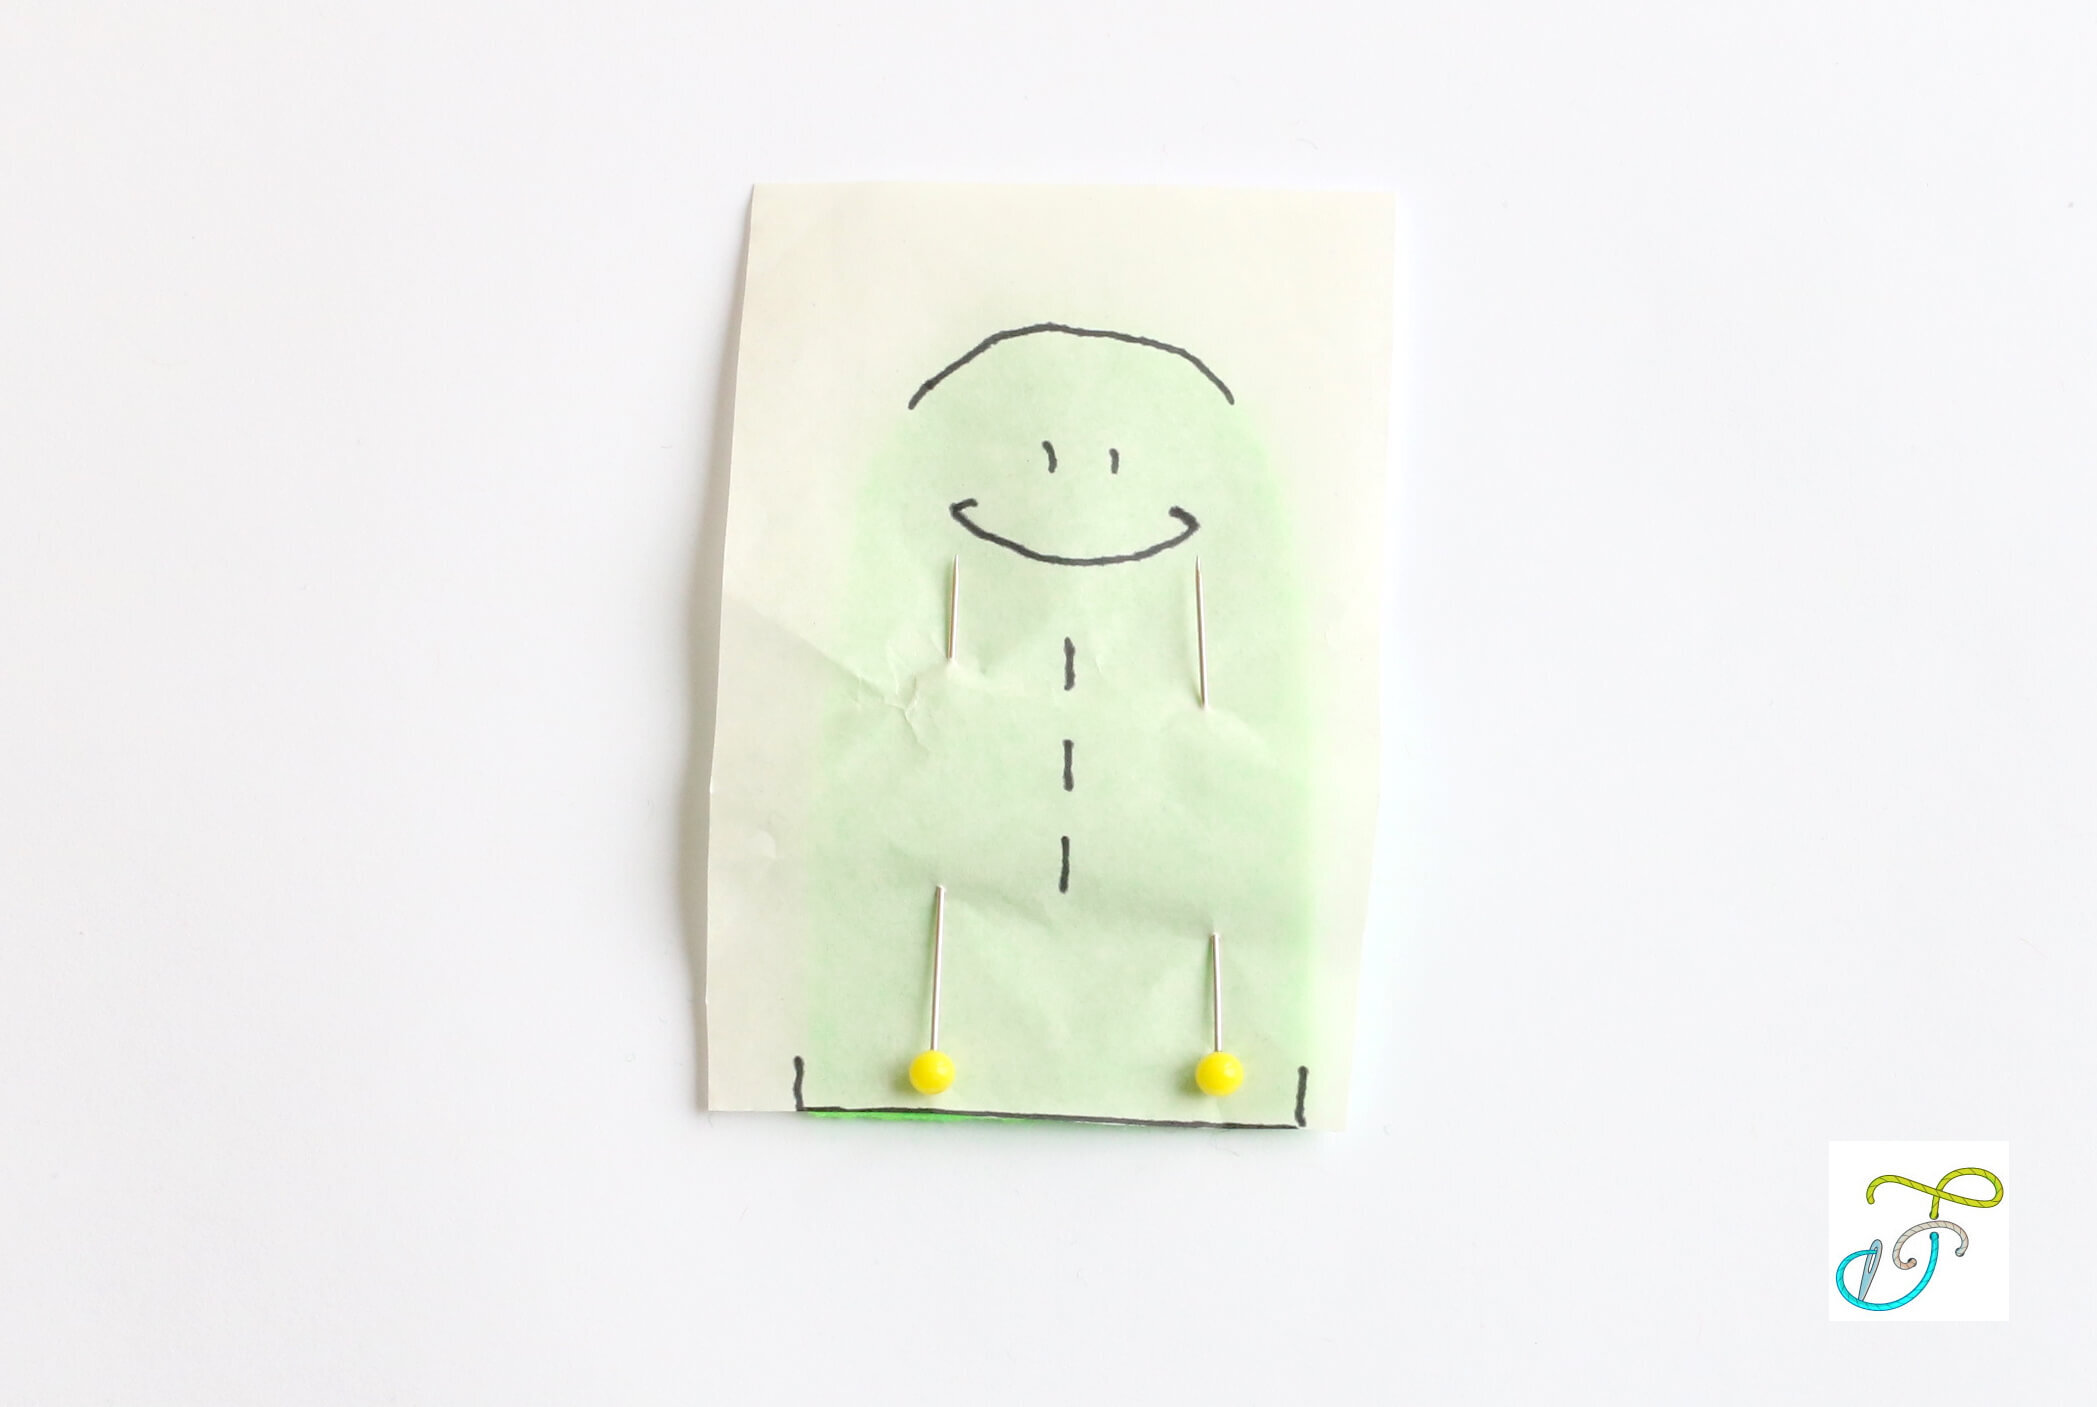
How do you trace embroidery designs to felt? My favorite method to trace embroidery patterns is using tracing paper. I draw the design on tracing paper and then sew through it to transfer the design. For more read on tracing the embroidery design, visit the 3 Ways on How to Trace on Felt For Embroidery tutorial.

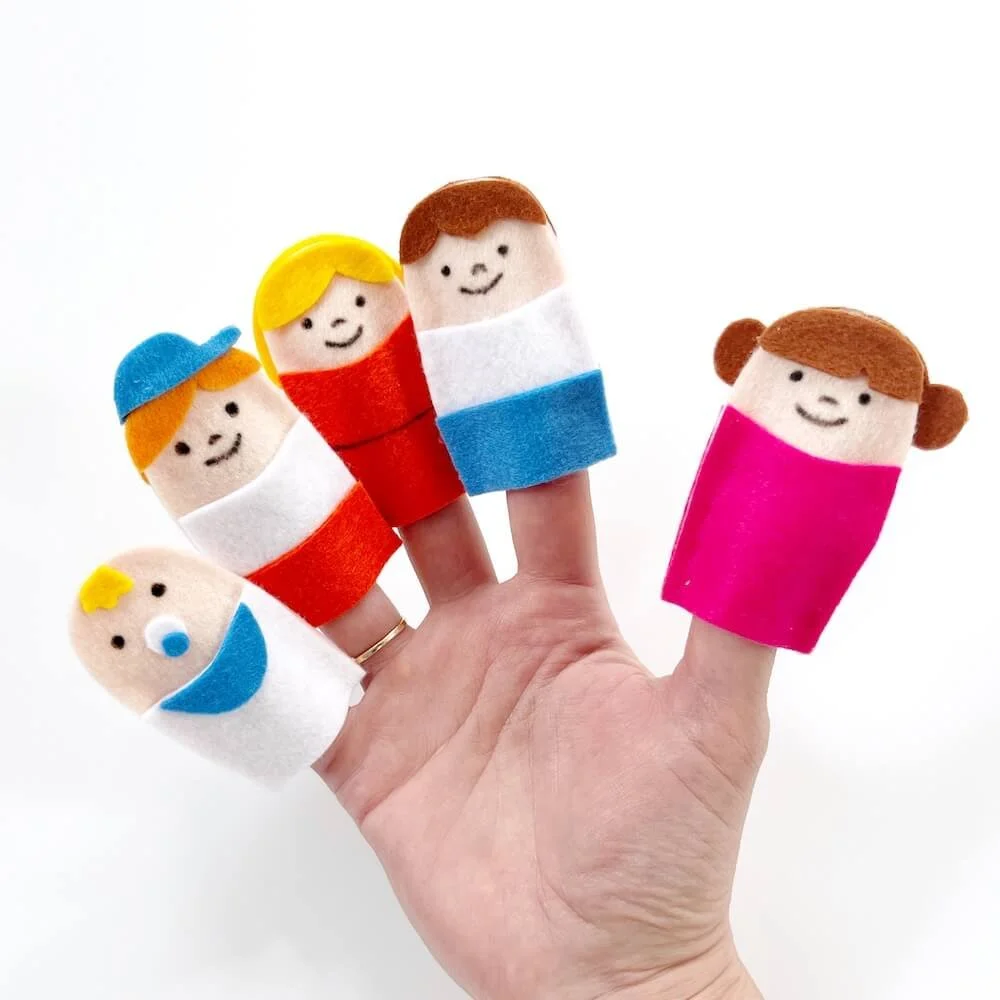
Lovely Felt Embroidery Project with Six Embroidery Stitches
If you're looking for a lovely and simple hand sewing project, why not try your hand at this felt embroidery project? You can create these beautiful mermaid finger puppets using six basic embroidery stitches (running stitch, whip stitch, fly stitch, French knot, backstitch, and chain stitch). This project is perfect for beginners or anyone looking to learn and practice basic embroidery stitches.

What Embroidery Needle and Thread to Use on Felt?
For any hand embroidery, you need thread and a needle.
Embroidery Thread for Felt
The most popular thread for hand embroidery is embroidery floss (stranded cotton). Another option is Perle cotton which achieves a much more textured effect than embroidery floss. Use silk thread for a high sheen in your embroidery design. You can sew with wool embroidery threads if you look for a harrier effect when stitching.

Embroidery floss, Perle cotton, Standard polyester thread
Embroidery floss, also known as stranded cotton, is most commonly used for hand stitching felt, especially for felt appliqué. It's inexpensive and comes in a wide variety of colors. Embroidery floss is composed of 6 individual strands of thread twisted into one thick strand. I recommend separating it into 1, 2, or 3 strands from the bunch after cutting it to the desired length. But it’s a personal preference depending on your project. Thicker thread is used for a tighter hold, visible stitching, or filling in details. Be aware that plush handmade toys, buttons, beads, and any small parts on toys made for children should not be sewn together with embroidery floss. They can be pulled apart much more easily than when sewn with polyester thread.
Embroidery floss is also available in silk, linen, glittered, metallic, and even glow in the dark! Variegated floss is a type of embroidery thread that gradually changes shade and even color while you are stitching because they are dyed with different color variations. When used carefully, variegated threads can create a lovely effect on an otherwise ordinary felt project.
Perle Cotton is a mercerized (treated to increase strength and add a bit of sheen), S-twisted, cotton embroidery thread. Perle cotton cannot be separated as compared to embroidery floss. It is extra soft and lustrous, thus the name, “Pearl.” Perle cotton comes in either a ball or skein and is available in different sizes (thicknesses). I prefer size 8 for felt crafts. For the Perle cotton, the higher the number is, the thinner the floss is.
Although it is not an embroidery thread, consider using polyester sewing threads, the exact same kind that you use for machine stitching, for handmade toys edges, buttons, beads, and any small parts on toys made for small children. These threads are strong and reliable. They're ideal for reinforcement stitches around edges and plain stitches.
Embroidery Needle for Felt
I use embroidery needles (also called crewel) when hand sewing and appliquéing with felt. Embroidery needles are similar to regular sewing needles or sharps. They have a sharp tip but have a larger eye for thicker threads to fit through. Needle sizing is universal for all needles. Keep in mind that the smaller the number size, the larger the needle. So, a size 6 needle is larger than a size 10. Popular embroidery needle sizes used to embroider are 7 and 9.
Choose the right sized needle. Opt for the smallest needle that will accommodate the thickness of your thread and that you are comfortable sewing with. Large needles can leave holes in your felt project.
For felt embroidery with standard sewing thread by hand standard needle (also known as sharps) is a good choice.

Embroidery needles and standard needles


Brief Guide to 9 Hand Embroidery Stitches for Felt
1. Running Stitch (Straight Stitch)
The running stitch, also known as a straight stitch, is a basic embroidery stitch. It is mainly used to outline a design or to make straight or curved lines. By varying the length of the straight stitch and the thickness of the thread, you can achieve different effects. You will use the running stitch to create seams or to hand appliqué felt shapes to felt. The running stitch is easy to learn. If you want to dive deeper into this embroidery stitch for beginners, read the complete guide on how to do the running stitch.
Tip: Don’t pull the thread too much, or else the felt fabric might ruffle.
How do I do a running stitch?
Bring a threaded needle up from the wrong side. On the good side, leave a space and push the needle back through the fabric (to the wrong side). Leave approximately the same space (on the wrong side). Repeat this step until the end of your project, or until you run out of thread.


In Fun Cloth Crafts felt designs, the straight stitch is used to connect two pieces of felt as in these patterns:
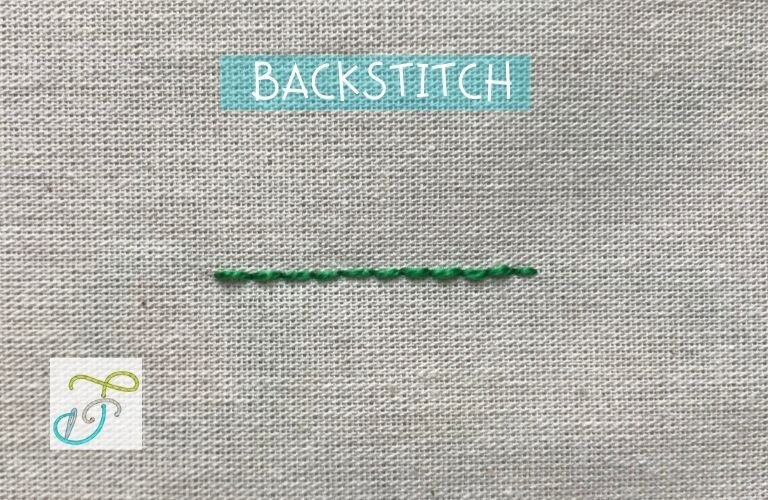
2. Backstitch
The backstitch is a basic type of stitch. It is excellent when you need a continuous line for an outline, a decorative line, or a satin stitch guideline. With this technique, you can also create beautiful hand embroidery letters on the fabric.
How do I do a backstitch?
To do a backstitch, bring the needle up through the fabric, then insert it back down a short distance away. Bring the needle up again, a short distance away from the previous stitch, and insert it back down through the fabric. Repeat this process, stitching one stitch at a time and keeping the stitches close together. It overlaps with (part of) the previous stitch on the backside of the fabric.

I apply the backstitch to decorate a mouth, or eyes in the patterns. Here are examples where you can practice this type of stitch:
3. Blanket Stitch
The blanket stitch is another basic hand embroidery stitch for felt. It is used along the fabric's edge to finish it off, attach appliqués or decorate lines. Starting the blanket stitch is usually the trickiest part, but it's so easy once that first step is done.
Add variation to the stitch by adjusting the spacing and height of the stitches.
Blanket Stitch How to:
Start by sending your needle up from the back at the desired length from the edge.
Make a stitch going around the felt fabric coming out at the same place as in step 1. You should have a loop now.
Send your needle under the created loop from step 2.
In this step, you start the first blanket stitch. Enter the needle into felt at the same length from the edge as in step 1. Make sure that the needle goes into the loop created in this step.
If you look for more detailed steps and photos, visit How to do blanket stitch from Holiday Crafts and Creations. The post also shows how to connect new thread when you run out of your current thread and how to end your blanket stitch.


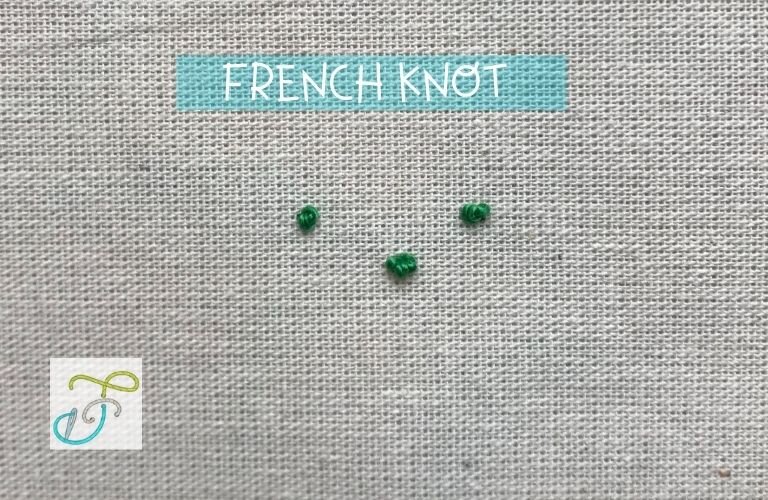
4. French Knot
The French knot is a decorative stitch. It's used to create texture or for filling space in a design. It remains a challenge for many stitchers. It’s all about practice.
French Knot How to:
In short, you wrap thread 1-3 times around a needle to make a knot. I personally like to wrap it three times, because it makes the knot bigger and more visible.
Then, you insert the needle back close to the original thread and hold the wraps down.
Finally, you pull the needle through the fabric.
The trick to making French knots is to hold the working floss tensed but not too tight. After some failed attempts, I have learned the french knot with the post Fool Proof French Knot for Hand Embroidery from Sublime stitching.


It is an excellent variant for tiny eyes if you do not want to use beads.
In my designs, the French knot is used in the following free patterns:
DIY birthday crown (in the flower detail)
5. Satin Stitch
The satin stitch is a classic embroidery stitch for filling an area. You can create any kind of smooth shape using this method. It is recognized by its closely spaced straight stitches. It might not look perfect at first, but practicing the stitches' length and proximity will make it look great. There are two options to make the satin stitch. In the first one, you mark the shape where you want to satin stitch and embroidery it following the marks. In the second option, you stitch an outline with backstitch and embroider over this. The second option is easier to embroider for a beginner.
Satin Stitch How to:
It is created using side-by-side and edge-to-edge straight stitching. Repeat the straight stitches, keeping the stitches close together to create a smooth, satin-like appearance.


In Fun Cloth Crafts free patterns, it is used for a nose:
6. Split Stitch
The split stitch creates a solid line with a texture. It is a good option for text and outlines. This stitch can be used as an alternative to the backstitch.
How do I do a split stitch?
To do a split stitch, bring the needle up through the fabric and then insert it back down, splitting the thread of the previous stitch. Bring the needle up again, a short distance away, and split the thread again, continuing in this way.


7. Whip Stitch
The whip stitch is also known as an overcast stitch. It is perfect for finishing seams of felt craft projects, attaching appliques, and sewing 2 felt pieces together. Tiny whip stitches almost disappear into the felt, while larger stitches give the felt craft a more primitive look. The most common length of whip stitch is between 1/8 of an inch and 1/4 of an inch.
It is an alternative to the blanket stitch for small pieces or no bulky decorative seams.
If you want to know more about the whip stitch, visit the easy-to-follow guide on how to whip stitch.
Whip Stitch How to:
Start by sending your needle up from the back at the desired length from the edge.
Go around the felt entering in the same place as in step 1, however, bring the needle diagonally up next to your first loop.
Continue going around the edge of felt. Poke the needle in the fabric directly under where the thread is coming up at the end of step 2. Angle the needle so that the thread comes up through the felt next to the last stitch. The result should be a whip stitch that is parallel to the previous stitch.


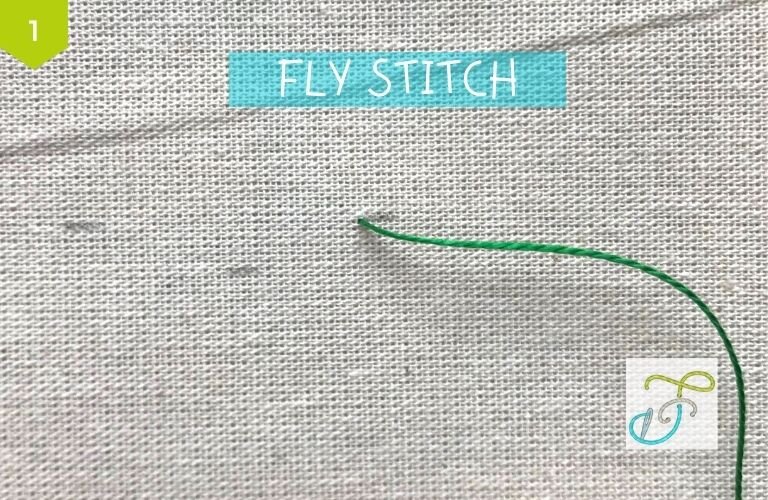
8. Fly Stitch
The fly stitch is a versatile decorative stitch that can be sewed as a single stitch or in rows. It can look like V, Y, or U. By using this stitch in a line, you can create branches or ferns.
Fly Stitch How to:
Bring the needle from the back to the front of the fabric.
Stick the needle into felt at the same horizontal level as the thread from step 1. Then pull it out at the bottom middle point (imagine a triangle). Make sure the thread is under the needle tip before you pull the needle through.
To finish the fly stitch, create a loop by sticking the needle slightly down from where the thread exits the fabric. If you leave the loop longer, you create a Y shape. If the loop is tight, but the upper thread is loose, it is a U shape.


Here are some designs where the fly stitch is used:
9. Cross Stitch
The cross-stitch works well for free-form embroidery or to fill an area of embroidery design. It's simply two straight stitches crossed at the centers.
Cross Stitch How to:
Bring the needle from the back to the front of the fabric.
Diagonally pass it to the back through the fabric.
Complete the cross by passing the needle up and again diagonally back through the material, crossing the first line.

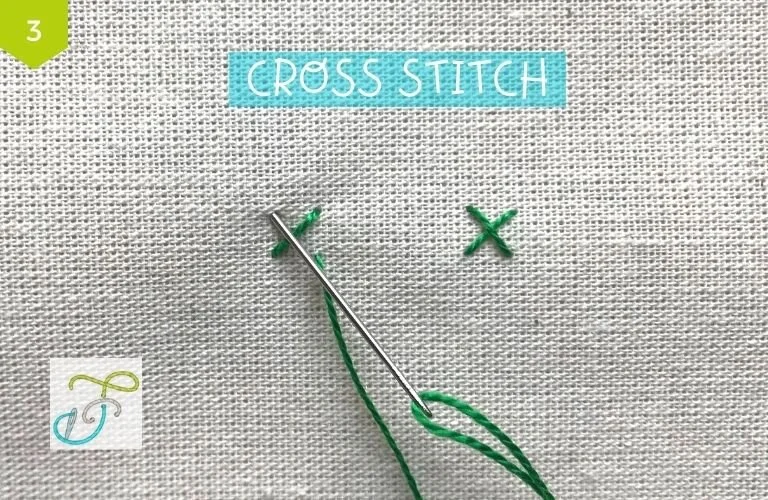


It could be used as an alternative to the french knot for eyes.


![Unicorn Felt Pattern [Free Finger Puppet Pattern]](https://images.squarespace-cdn.com/content/v1/5f68de73f977627048ed931f/1692949722187-12HRB4KTZREOW9S36A32/Unicorn+Felt+Pattern+%7C+Felt+unicorn+keychain+and+felt+unicorn+finger+puppet+in+pink+color+looking+left+%7C+Thumbnail.jpeg)

![Enchanting Woodland Animal Finger Puppets [Free Pattern]](https://images.squarespace-cdn.com/content/v1/5f68de73f977627048ed931f/1690731385758-V9EAARSSZUQPR9XZC008/Woodland+animal+finger+puppets+with+free+pattern+Thumbnail.jpg)

To Conclude 9 Hand Embroidery Stitches:
The post shows 9 hand felt embroidery stitches that are excellent for felt crafts. You can use the running stitch, the blanket stitch, or the whip stitch to keep two pieces of felt together. The running stitch is easy and fast, the whip stitch looks seamless, and the blanket stitch is bulky and eye-catching. For attaching appliques, the blanket stitch and whip stitch are your choice. When you would like to create outlines, backstitch and split stitch are the ones you will go for. Specifically for eye designs, you can use the French knot or the cross-stitch. It is a good alternative to beads. For decorating, you might play with the satin stitch and the fly stitch.
I hope you enjoyed reading, learning, and practicing these hand embroidery stitches. If you have any questions, please leave a comment below.
If you find this post useful, take a moment and share it on social media; tag #funclothcrafts.
Let’s learn together!
XO, Anna