FUZZY - Mouse Felt Toy Kids’ Craft [FREE PATTERN]
This post contains affiliate links, which means I may earn a small commission at no additional cost to you if you click through the link and make a purchase. For more information, click here.
Are you looking for mouse craft ideas that are simple to make? This step-by-step tutorial shows you how to make a felt mouse softie. This simple mouse craft for kids is the next of my kids’ crafts ideas that I love to do with my kids and their friends. You can use this free sewing pattern for toy mouse with your kid and teach them hand sewing basics. But, of course, anybody, not only kids, is welcome to sew this simple mouse pattern. You could also scale it down and make a mouse keychain if you prefer. While making the mouse softie, you will learn how to cut felt pieces, appliqué, and hand sew.
Happy crafting with kids!

This year 2021, I have been part of Sew a Softie hop. I shared a unicorn softie kids’ craft. The Sew a Softie initiative started back in 2015. It’s organized by Trixi, who wanted to encourage children worldwide to sew and learn how to sew. I got totally hooked up with the idea and see inspiration everywhere around me. So be ready for more softie free patterns.
This stuffed mouse free pattern was inspired by a mouse drawing of my niece. She was on holiday in my house when her tooth fell off. She left the tooth below her pillow, waiting for a tooth fairy to visit (the one that comes in her Czech house). Unfortunately, the tooth fairy didn’t come as she doesn’t know our house (Austria). The next day my niece learned that mouse Perez (Raton Perez, my husband is Argentinian) visits our home instead of the tooth fairy. She was enthusiastic and drawn the little mouse called Fuzzy in the expectation of the mouse coming for her tooth the next night. Did he come? Yes, he did and left her some little Euros.
General Instructions for DIY Simple Mouse
This fun and simple mouse softie is easy to make and an excellent first sewing pattern for your kids. It’s stitched entirely by hand, using a running stitch and backstitch. You can also use glue to attach the Fuzzy’s eyes and muzzle.
Looking for a guide on embroidery stitches to help you with your stitching? Visit the article 9 hand embroidery stitches for felt to learn more about basic embroidery stitches.
Step-by-step instructions follow to make the simple felt mouse. The finished soft toy is approximately 6” (15 cm) tall. The Fuzzy mouse softie is made from felt. You can choose felt colors you like to make Fuzzy.
This free mouse sewing pattern includes the mouse softie free template, a material and supply list, complete instructions, and photos.
Two-strand embroidery floss is used to embroider the felt mouse. Knot thread ends on the wrong side of felt or in between two felt layers. If you don’t have embroidery floss at home, you can go for sewing thread instead (the one you use for sewing at the sewing machine).
Tips for Sewing with Felt
TIP for holding pieces in place for sewing: Felt pieces can be pinned to the body shape to hold them in place until they are stitched.
Another option is to place a tiny dab of instant dry fabric glue on the reverse side of felt shapes and position them on the body. Elmer’s Craft Bond glue is a good glue for felt.
TIP for sewing with felt: Searching for more information about sewing with felt? Visit my post on how to sew felt: tips for sewing with felt.
TIP for cutting felt shapes: If you like to learn some tips on how to cut out felt pieces, you can read my post about 6 techniques for cutting felt shapes.
TIP for tracing on felt: You are welcome to read how to trace on felt post to learn more about transferring the pattern on felt for embroidery.
Materials & Supplies for DIY Felt Mouse Softie
Fuzzy: mouse softie free template - to download the file, subscribe to the FunClothCrafts newsletter. In the newsletter, you find a password to the subscriber's Free Downloads Vault
Felt sheets (find great felt at Benzie Design or find more buying options in the Types of Felt section of How to Sew Felt blog post): one grey color felt sheet for mouse body and ears, blue and black felt scraps for the eyes, red for the inner ear, brown for the nose. You can also change the color based on your choice. These are the colors my niece chose.
embroidery floss: matching colors to the darker tone of felt, black, blue, red, grey, brown.
fiber fill to fill the softie
small or embroidery scissors (KAI 5 1/2 inch Embroidery Scissors are the ones I use)
pencil or an air erasable pen to copy the template to felt
fabric permanent marker (optional - for whiskers)
pins (optional - these are my favorites)
a glue that works on felt (optional - Elmer’s CraftBOND glue works well)

How to Make a Mouse Softie

Use the free template from Materials & Supplies (section above) to cut out all mouse felt shapes from felt. You can use a pencil to trace the pattern or an air erasable pen. For other ways on how to cut felt shapes visit my post 6 ways on how to cut out felt.

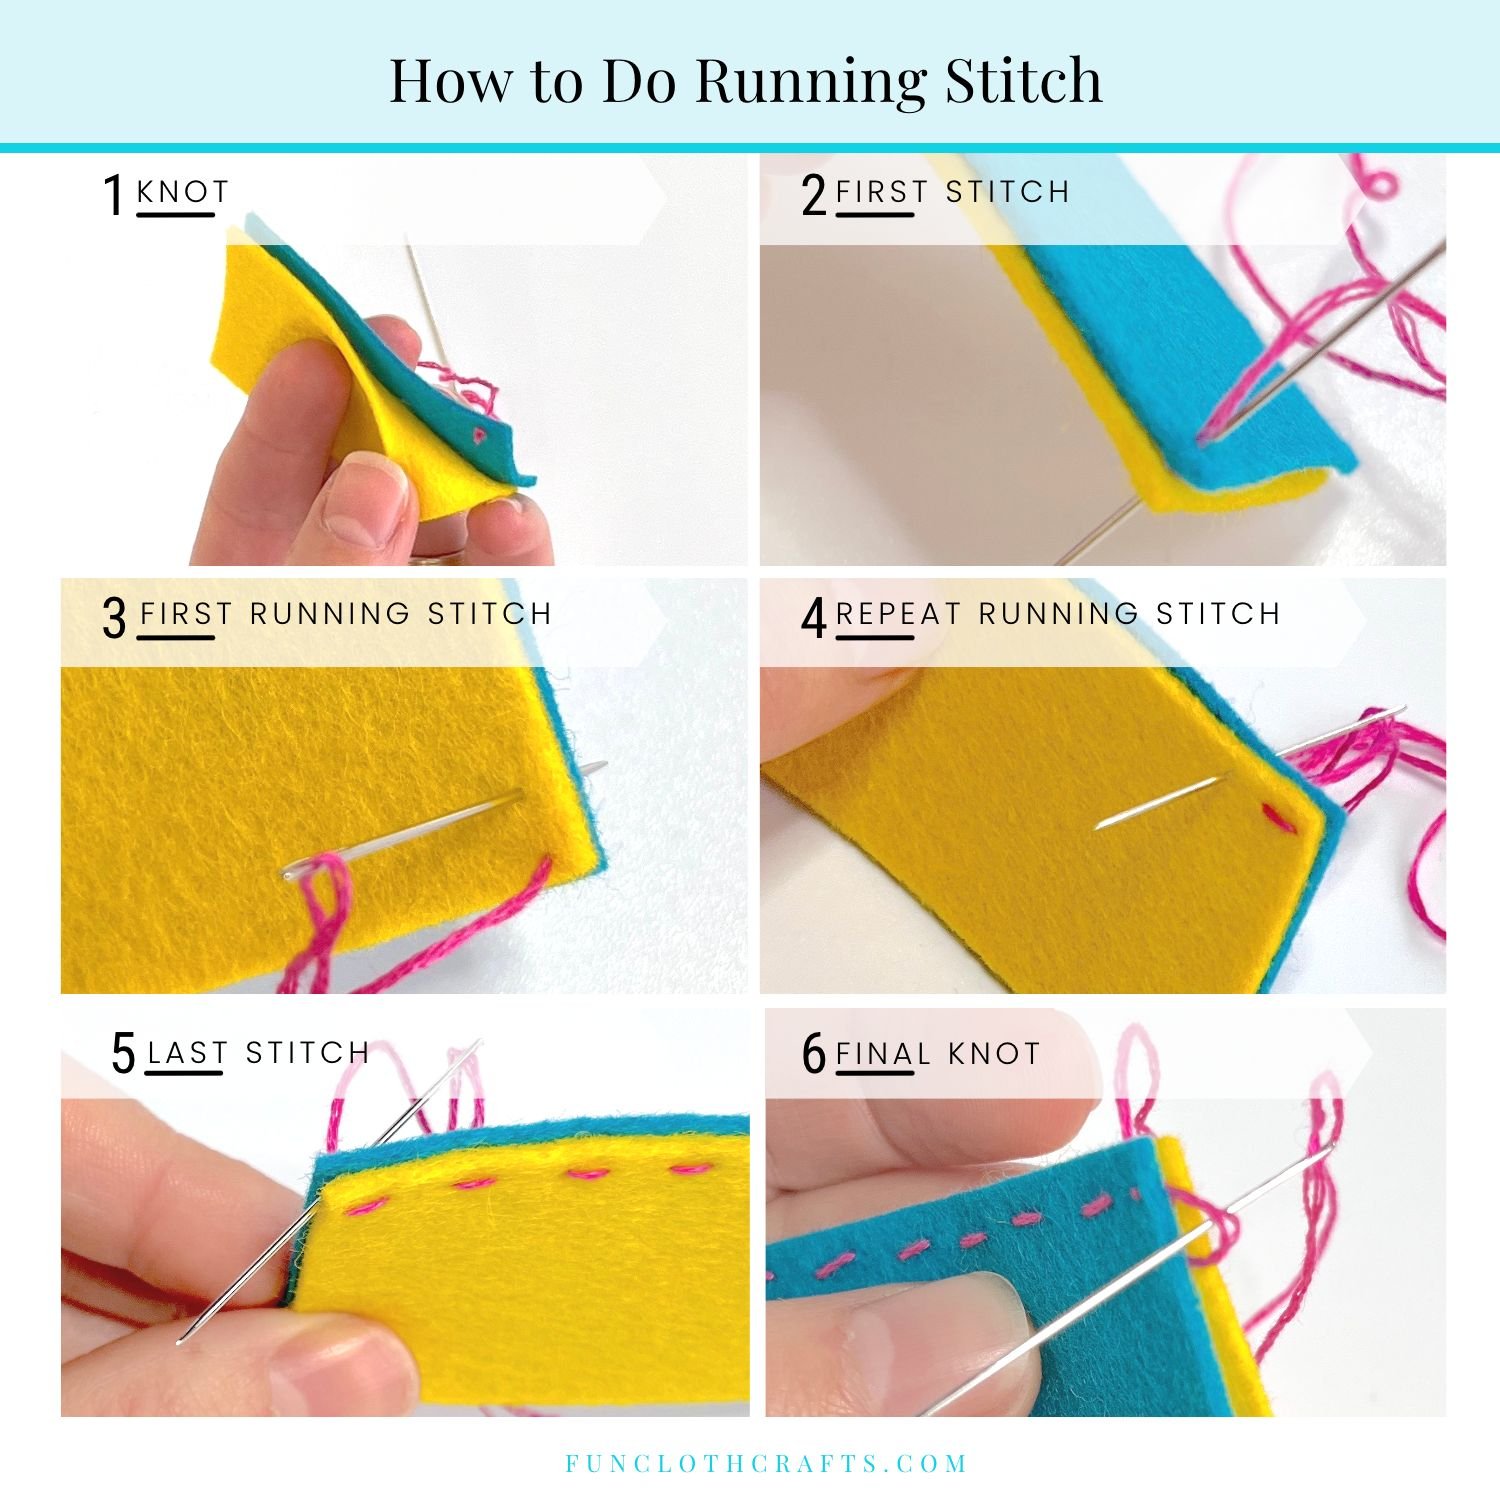
2. Pin or hold the blue eye in its position following the pattern and stitch with a running stitch. I have used one-strand embroidery floss. To do the running stitch, you have to pass the needle in and out of the felt fabric at a regular distance. When completed, the running stitch will look like a dashed line. Repeat for the other eye.
Depending on your kid’s age and patience level, you can also glue the eye. Sewing a button as an eye could look great as well!

3. Pin or hold the black pupil on the blue eye following the pattern and stitch with a couple of stitches (two on the side and one or two in the middle). Repeat for the other eye.

4. With a pencil, draw the eyelashes. Embroider with the backstitch (three stitches). The backstitch is made backward from the direction that the embroidered line is going. You can also draw the eyelashes with a permanent marker or leave your mouse softie without eyelashes.

5. Pin or hold the nose in its position following the pattern and stitch with a running stitch. You can also help yourself with a dab of glue.
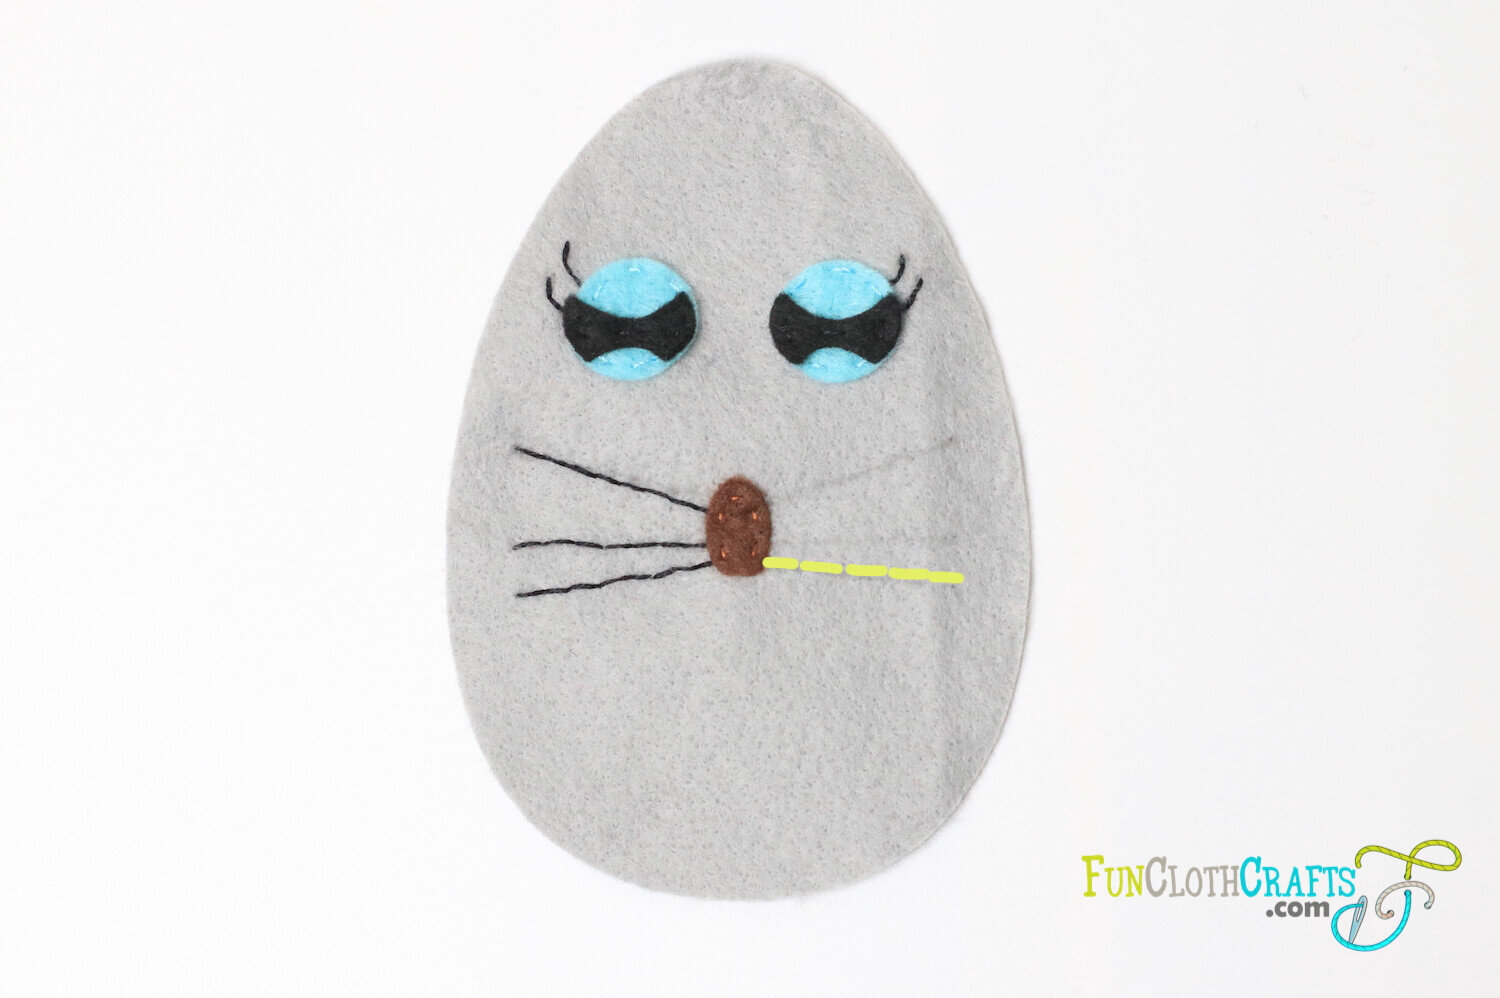
6. With a pencil, draw the whiskers. Embroider with the backstitch. You can also draw the whiskers with a permanent marker.

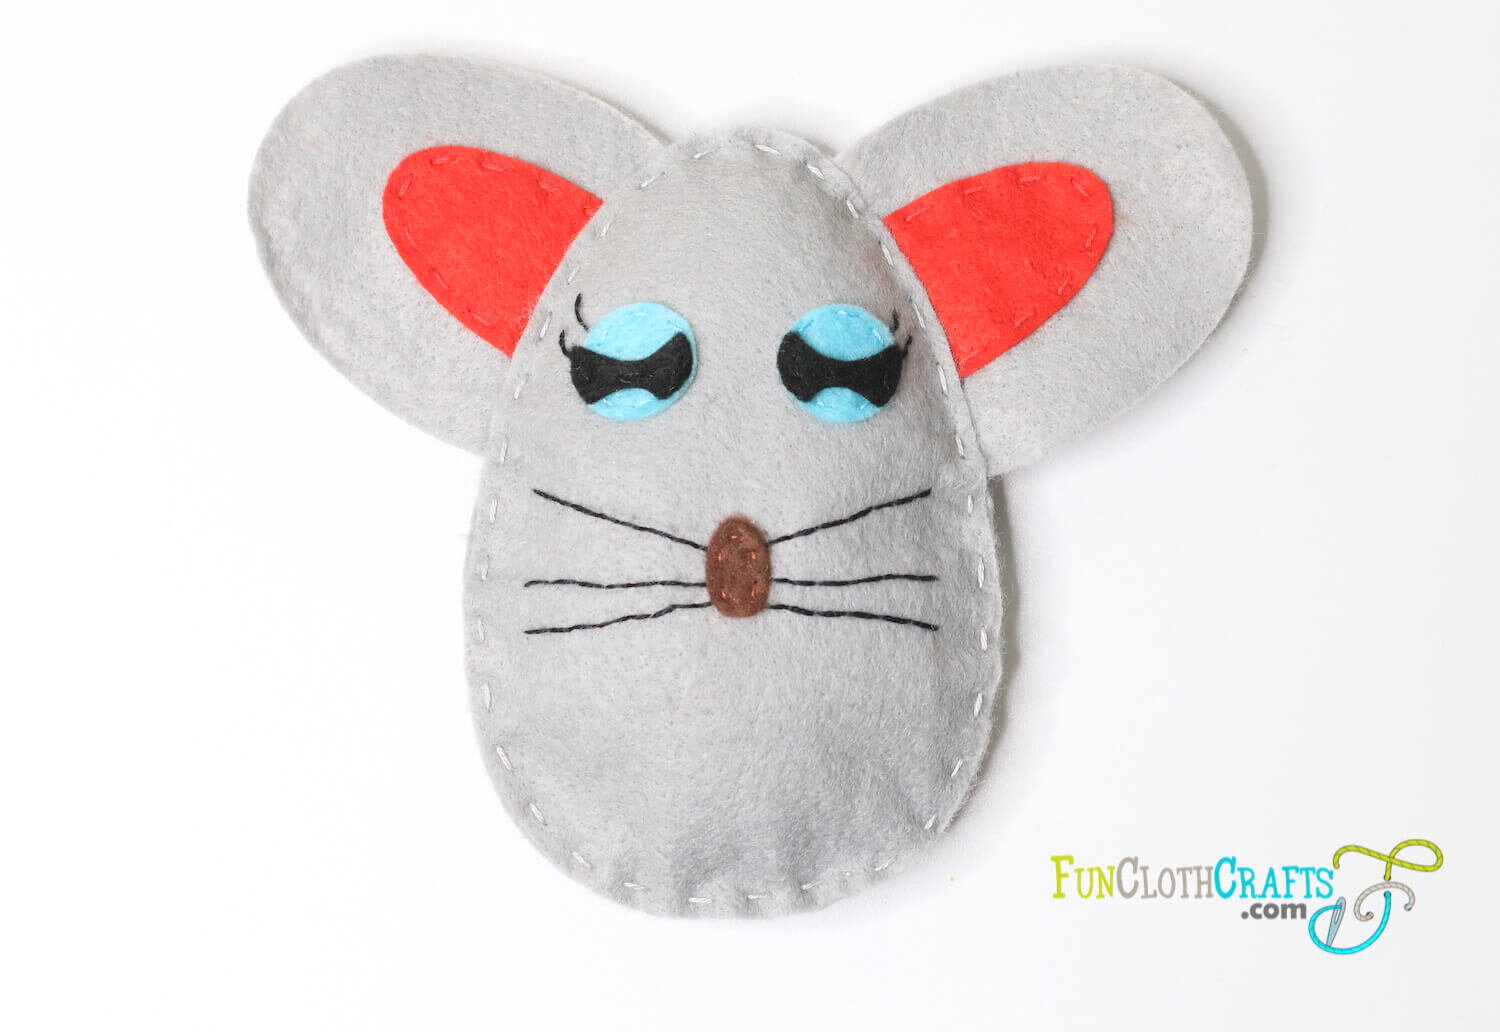
7. Take the inner ear shape and attach it to the mouse’s ear with a running stitch. Follow the free template for the exact placement. Repeat for the other ear.

8. Assemble the felt mouse holding the parts with pins (ears, front body, and back body). Start sewing with the running stitch close to the edges, leaving an opening below.

9. Fill Fuzzy, the mouse with fiber fill. You can help yourself with a pencil. Fill as much fiber fill as you like.
10. Close the opening with the running stitch. Your DIY Simple Mouse Softie made with Fun Cloth Crafts free pattern is ready to play with.

Fuzzy - Mouse Felt Softie Kids’ Craft
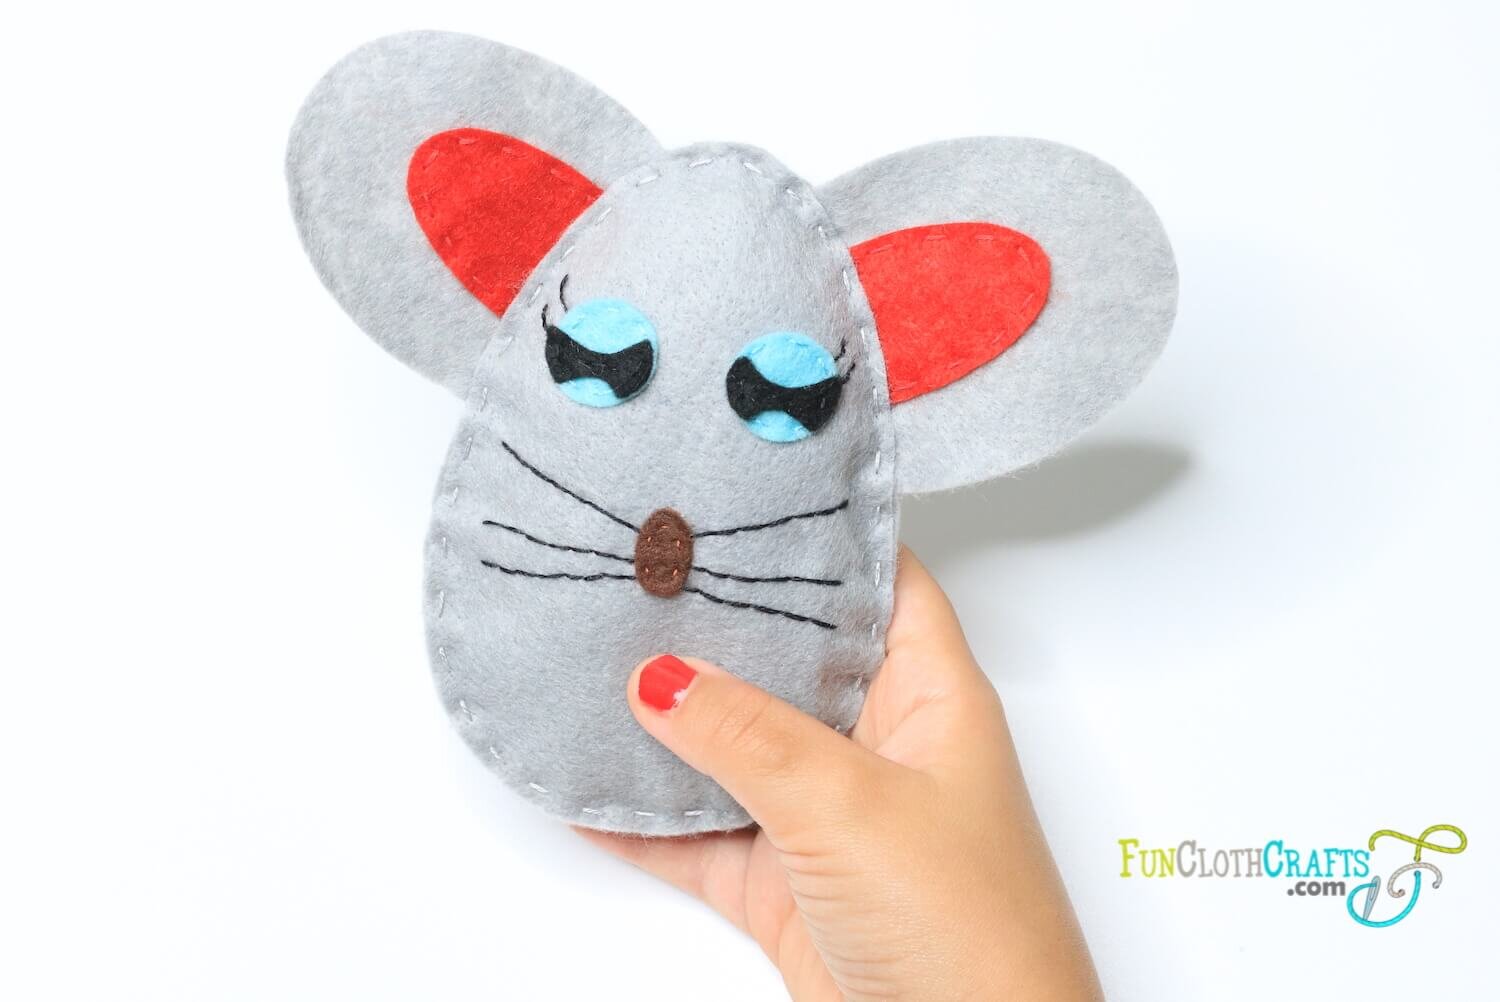
Mouse Softie made with Fun Cloth Crafts free pattern
To Wrap Up
Thank you for felt crafting with me! I would love to see your stuffed mouse softie craft project. So if you like to share it, please send me your pictures. You can also share your creations on Instagram using #funclothcrafts.
I welcome any feedback as it is important to make my patterns better. Don’t hesitate to contact me with your suggestions at anna@funclothcrafts.com.
Be sure to visit more on this website for free embroidery and sewing tips and tricks to help you out as you stitch my patterns. For free felt patterns visit my Freebies page.
Feel free to join my mailing list! You’ll receive updates on new patterns, the latest tips & tricks, and special promotions.
Let’s craft together!
XO, Anna
Copyright 2021 by Fun Cloth Crafts
Pattern may be copied for noncommercial use only. You can use it to make as many Mouse Softies as you want for yourself or as gifts, but please don’t make any for sale.